Connecting to Active Directory CardDAV Address Book using eM Client
To connect to CardDAV server in In eM Client go to Tools - > Accounts menu:
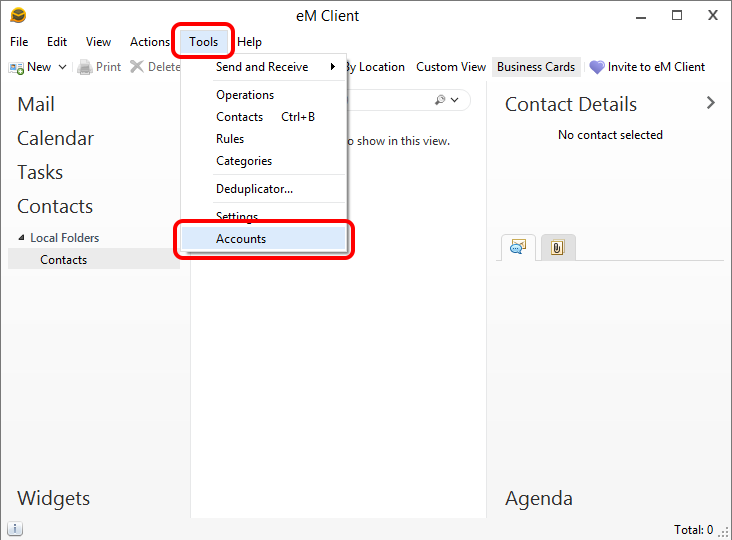
In New Account dialog navigate to Contacts. Select CardDAV option and select Next.
In 
Fill in the connection settings. Specify the complete CardDAV address book URL in the Account address URL field. This URL depends on the address book that you want to connect to and provided by your administrator. Also this article describes how to find a URL of the required address book using the IT Hit Active Directory CardDAV Server administrative UI.
It is strongly recommended to use SSL connection to secure your data and credentials.
In the User name and Password fields provide your windows domain credentials. Select Next:

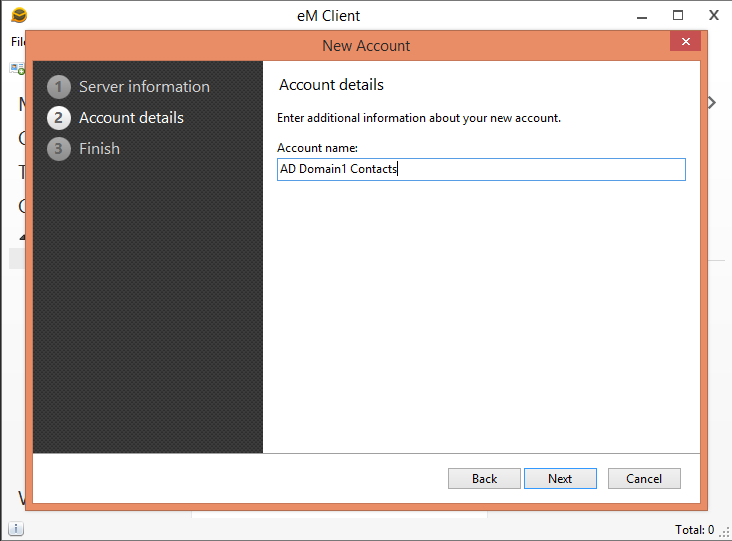
Fill the Account name field and select Next:
On the last step select Finish.