Connecting to Active Directory CardDAV Address Book on Android
Android does not provide built-in CardDAV support. To connect to CardDAV server from Android, you will need to install a third-party CardDAV connector. Regardless of the connector application you install, your Active Directory contacts will be available in Android Contacts application as well as in any application that utilize Android contacts, such as e-mail applications.
Below we will show how to use CardDAV-Sync Free Android connector. In general the process of connecting to CardDAV server is similar for all connectors.
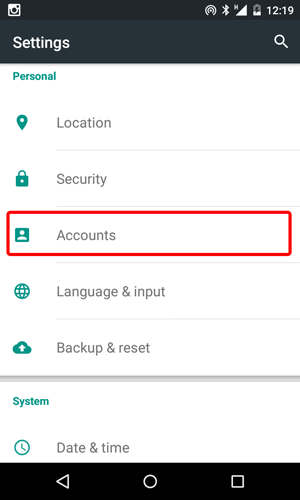
Open Android Settings and select Accounts option:
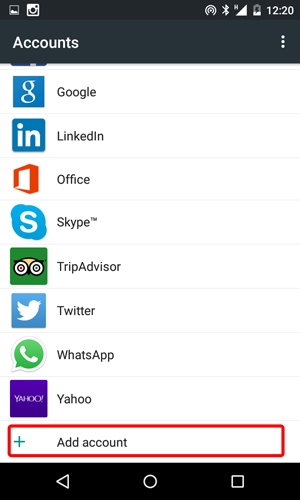
In Accounts dialog Scroll down and select the Add Account option:
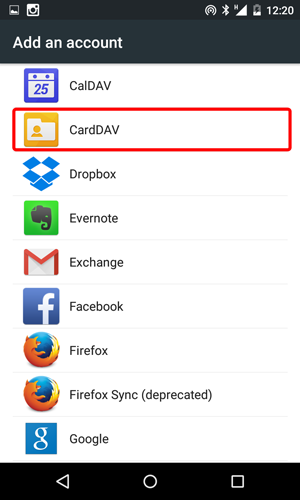
In Add an account dialog select CardDAV:
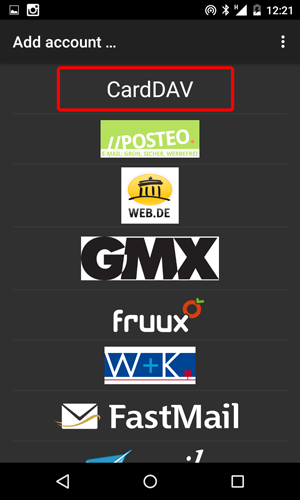
This will run your connector, where you provide connection settings. In case of CardDAV-Sync Free application select CardDAV:
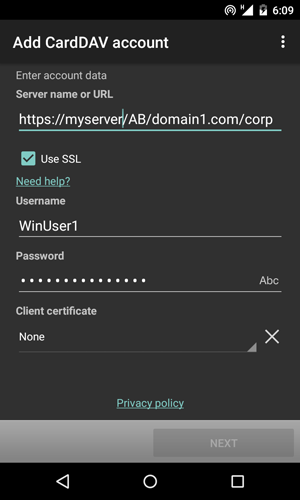
Fill in the connection settings. Specify the complete CardDAV address book URL in the Server name or URL field. This URL depends on the address book that you want to connect to and provided by your administrator. Also this article describes how to find a URL of the required address book using the IT Hit Active Directory CardDAV Server administrative UI.
It is strongly recommended to use SSL connection to secure your data and credentials.
In the Username and Password fields provide your windows domain credentials. Select Next:
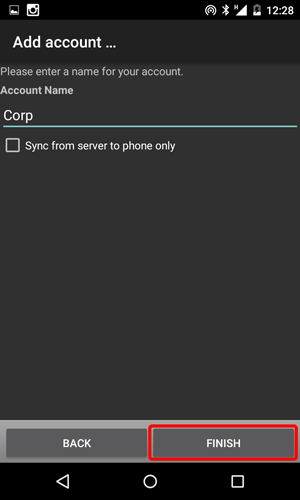
Specify name for your account and select Finish:
Select Done in the next dialog:
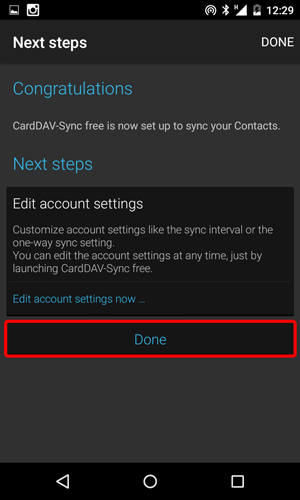
The contacts from the selected address book start syncing immediately to your device. Now you can open your Android Contacts application to access and edit contacts from Active Directory as well as to access them from other applications.
You can limit the Android to show only contacts from Active Directory. Open Contacts application and select Contacts to Display in the top menu. Select your CardDAV address book.